Originally posted 2023–05–28 Last updated 2024–12–14
Overview of “The Bonehoard”
The levels in the first two Thief games are known for being incredibly sprawling and detailed, and often they do a great job of feeling like real places. My original goal was to be able to create top-down images of these levels that looked as though they had been rendered in-game.
To this end, I’ve so far been able to do something like that. At the time of writing, it still has rough edges, but it’s definitely good enough to get lost poring over the levels.
One significant thing I’ve found while looking at these levels is that areas that I assumed were not laid out realistically actually are, and areas I assumed were laid out reasonably are actually bonkers (see: The Sword).
My plan is to keep refining this thing until I’m happy with it. I’ll expand this page as I go.
On this page I’ve recounted the story of putting it together, as well as a heap of images created with it.
Process
I had a look at some existing tools before building anything. DromEd was an obvious consideration. It partially does what I want, but has a clear disadvantage in that looking at a level in DromEd does not look much like it was rendered in-game.
There were other tools like Dark Engine Viewer which are fantastic tools, but again not quite what I want. An issue with many of these tools is that I am unable to modify them to do exactly what I want.
While not really useful to me, this System Shock 2 viewer confirmed to me that this would be pretty cool if it worked!
In the end, I came across openDarkEngine (OPDE), a long-running project to create an open-source implementation of the Dark Engine. These days it looks to be abandoned, sadly, but it sounded like it was in a good-enough state to try building my desired features in.
Initially I tried to get it running on Windows, but that was a pain, most likely caused by my attempting to use GCC to compile it, rather than MSVC. All signs point to the original developer of the engine using MSVC. Anyway, rather than doing the sensible thing of installing MSVC, I setup Linux and got to work building dependencies. One of the core reasons for not being able to build previously was that openDarkEngine implicitly depended on a specific version of Ogre3D, the game library/engine used.
The latest version had removed required features, and the version provided by my distro was too old. Judging by the date of the last commit on the repo, I needed version 1.10. So I downloaded the source, installed what felt like a million dependencies, all the while hoping that none of them had broken compatibility! Eventually I managed to build Ogre3D, configure OPDE to look in all the right places to find Ogre3D, and Praise The Builder, actually build it.
Well, I had an executable file. Reading through the thankfully quite good documentation in the OPDE repository indicated I needed configuration to find my Thief files. Of course!
After I’d copied files over from my Windows partition - praying that they were in a good state, and hadn’t been messed with as part of some other experiment - I setup my config to run miss1.mis and ran it.
I was presented with something like this… 
In short, almost none of the textures had loaded! After browsing the log file that OPDE outputs after every run, I was able to determine that I had a case-sensitivity problem. Whether this thing had ever been run on Linux before is not clear to me. However, my assumption is that while inconsistent casing of filenames between the mission file and the referenced image is not a problem on Windows, it hadn’t been accounted for here.
After some thinking, my solution was to write a script that let me rename texture files to lowercase, then modify the engine to always look for texture filenames in lowercases. Not necessarily elegant, but it seemed to be working.
However, in spite of this, the textures for the level geometry itself would not load at all. My process so far had been to decompress the .crf files (secretly just a Zip archive), make my changes, then re-compress them. I realised that the structure of the OPDE configuration let me load resources directly from the uncompressed folder instead. For some reason that I still don’t undestand, that fixed my level textures. Dunno why.
Now that I had some halfway-reasonable textures, I could look at building my desired features. Changing the camera from perspective to orthographic turned out to be dead-easy. The Ogre3D camera class provides a method, this->setProjectionType(PT_ORTHOGRAPHIC); which did the job.
Along with a call to this->setOrthoWindowHeight(100);, I had an orthographic view of the level. Although it seems like OPDE does have some unfinished code for walking around as the player, by default it runs in a free camera mode, so there was no need for me to modify movement controls in order to do some basic flying around.
At this point, I had an orthographic view, but only of a small area at a time. You can see here that it’s definitely the entrance to Bafford’s Manor, but not much else.  Even getting that screenshot required some careful wiggling to maximise the visible parts while not blocking out the whole scene by going too far back.
What followed this was a whole lot of trying things.
One key change that definitely had a positive effect was enabling backface culling on the skybox. With that, I was able to move the camera back further without everything suddenly going black as the camera went outside of the skybox.
That left me with a more complex issue. A lot of code in OPDE goes into selecting parts of the world that are not visible to the player, and excluding them from being rendered. This especially took a lot of fiddling about with the code until I happened across something that worked. In the end, there was code which “enlarged the portal” to progressively fit stuff that should be visible. By changing this portal to fit the whole screen, almost everything became visible. It should be clear at this point that I am not knowledgeable about 3D programming.
With these two key changes, I was able to see almost everything at once (which came with a pretty huge performance hit). Next I added a few extra conveniences.
One, the ability to move my orthographic camera up and down relative to my angle of view. Due to the orthographic projection, moving forward and back along the Z-axis results in a appearance of no movement, so navigating the world that way becomes confusing.
Next up, I wanted to be able to quickly re-set my angle to top-down. I tried a heap of ways of doing this, none of which seemed to work that well. In the end, I went with this hack:
Vector3 vector(0, 0, -1);
Vector3 target = mCamera->getPosition() + vector;
mCamera->lookAt(target);
Basically, making the camera look at a point directly below it. Works great!
Finally, I wanted to add the ability to dynamically change the “ortho window height” mentioned before. When using an orthographic projection, the apparent size of objects doesn’t get closer, so the window height effectively becomes our “zoom level”.
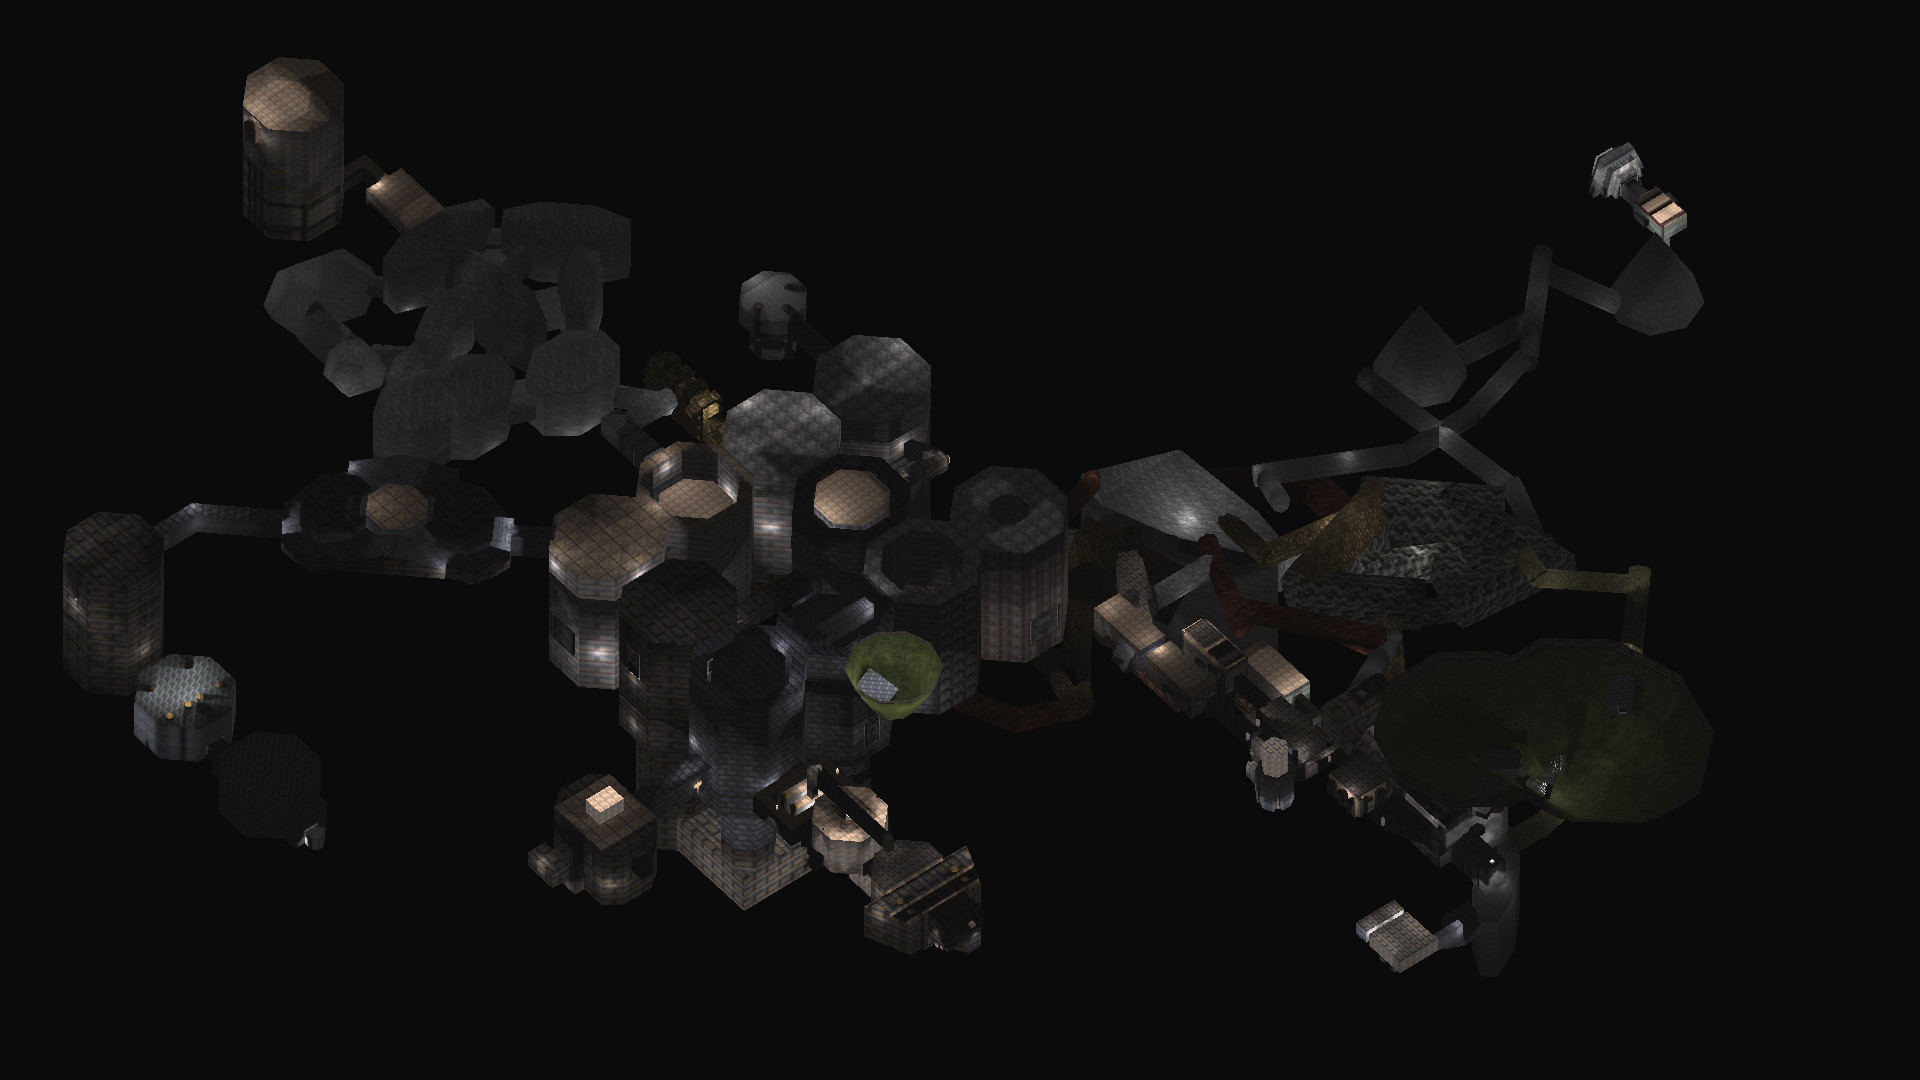
In 2024 I received a message from a Reddit user who had enjoyed the images, asking whether I could provide top-down grabs of all of the levels that they could use to produce maps. I was happy (excited even) to oblige — given that I could get the engine running again.
One of the most bothersome issues when I originally posted was that were rooms that were somehow “cut off” from the rest of the map. They weren’t visible from the outside, and vice versa, plus navigating in and out of them was quite strange; it was possible to navigate the camera into a room and then be unable to leave it again. This took a bit of playing around, but I eventually found the key part of the scene manager code: the bit where it picks which “cells” of the map should be rendered. This was essentially a loop that would continue past any elements that weren’t appropriate to render based on the current position etc. So, I commented out the condition checking whether a given cell is visible, et voilà, all rooms were rendered at once. Anyway, I have added a link to these images to the following Pics section.
At the time of writing, there are still a couple of important things to do. I need to fix the remaining textures. There’s a lot of bright yellow water still present.
Pics
Anyway, here are a bunch of pages with pics from levels.